
D.I.Y: HANDMADE PAPER BAG
Photo by BOCO for Hello Tokyo. You can purchase the book here at Amazon.
You will need wrapping paper, wide mt tape, handles from an old paper bag, collage materials (optional), tape glue, craft bond glue, bone folder (optional) and scissors.
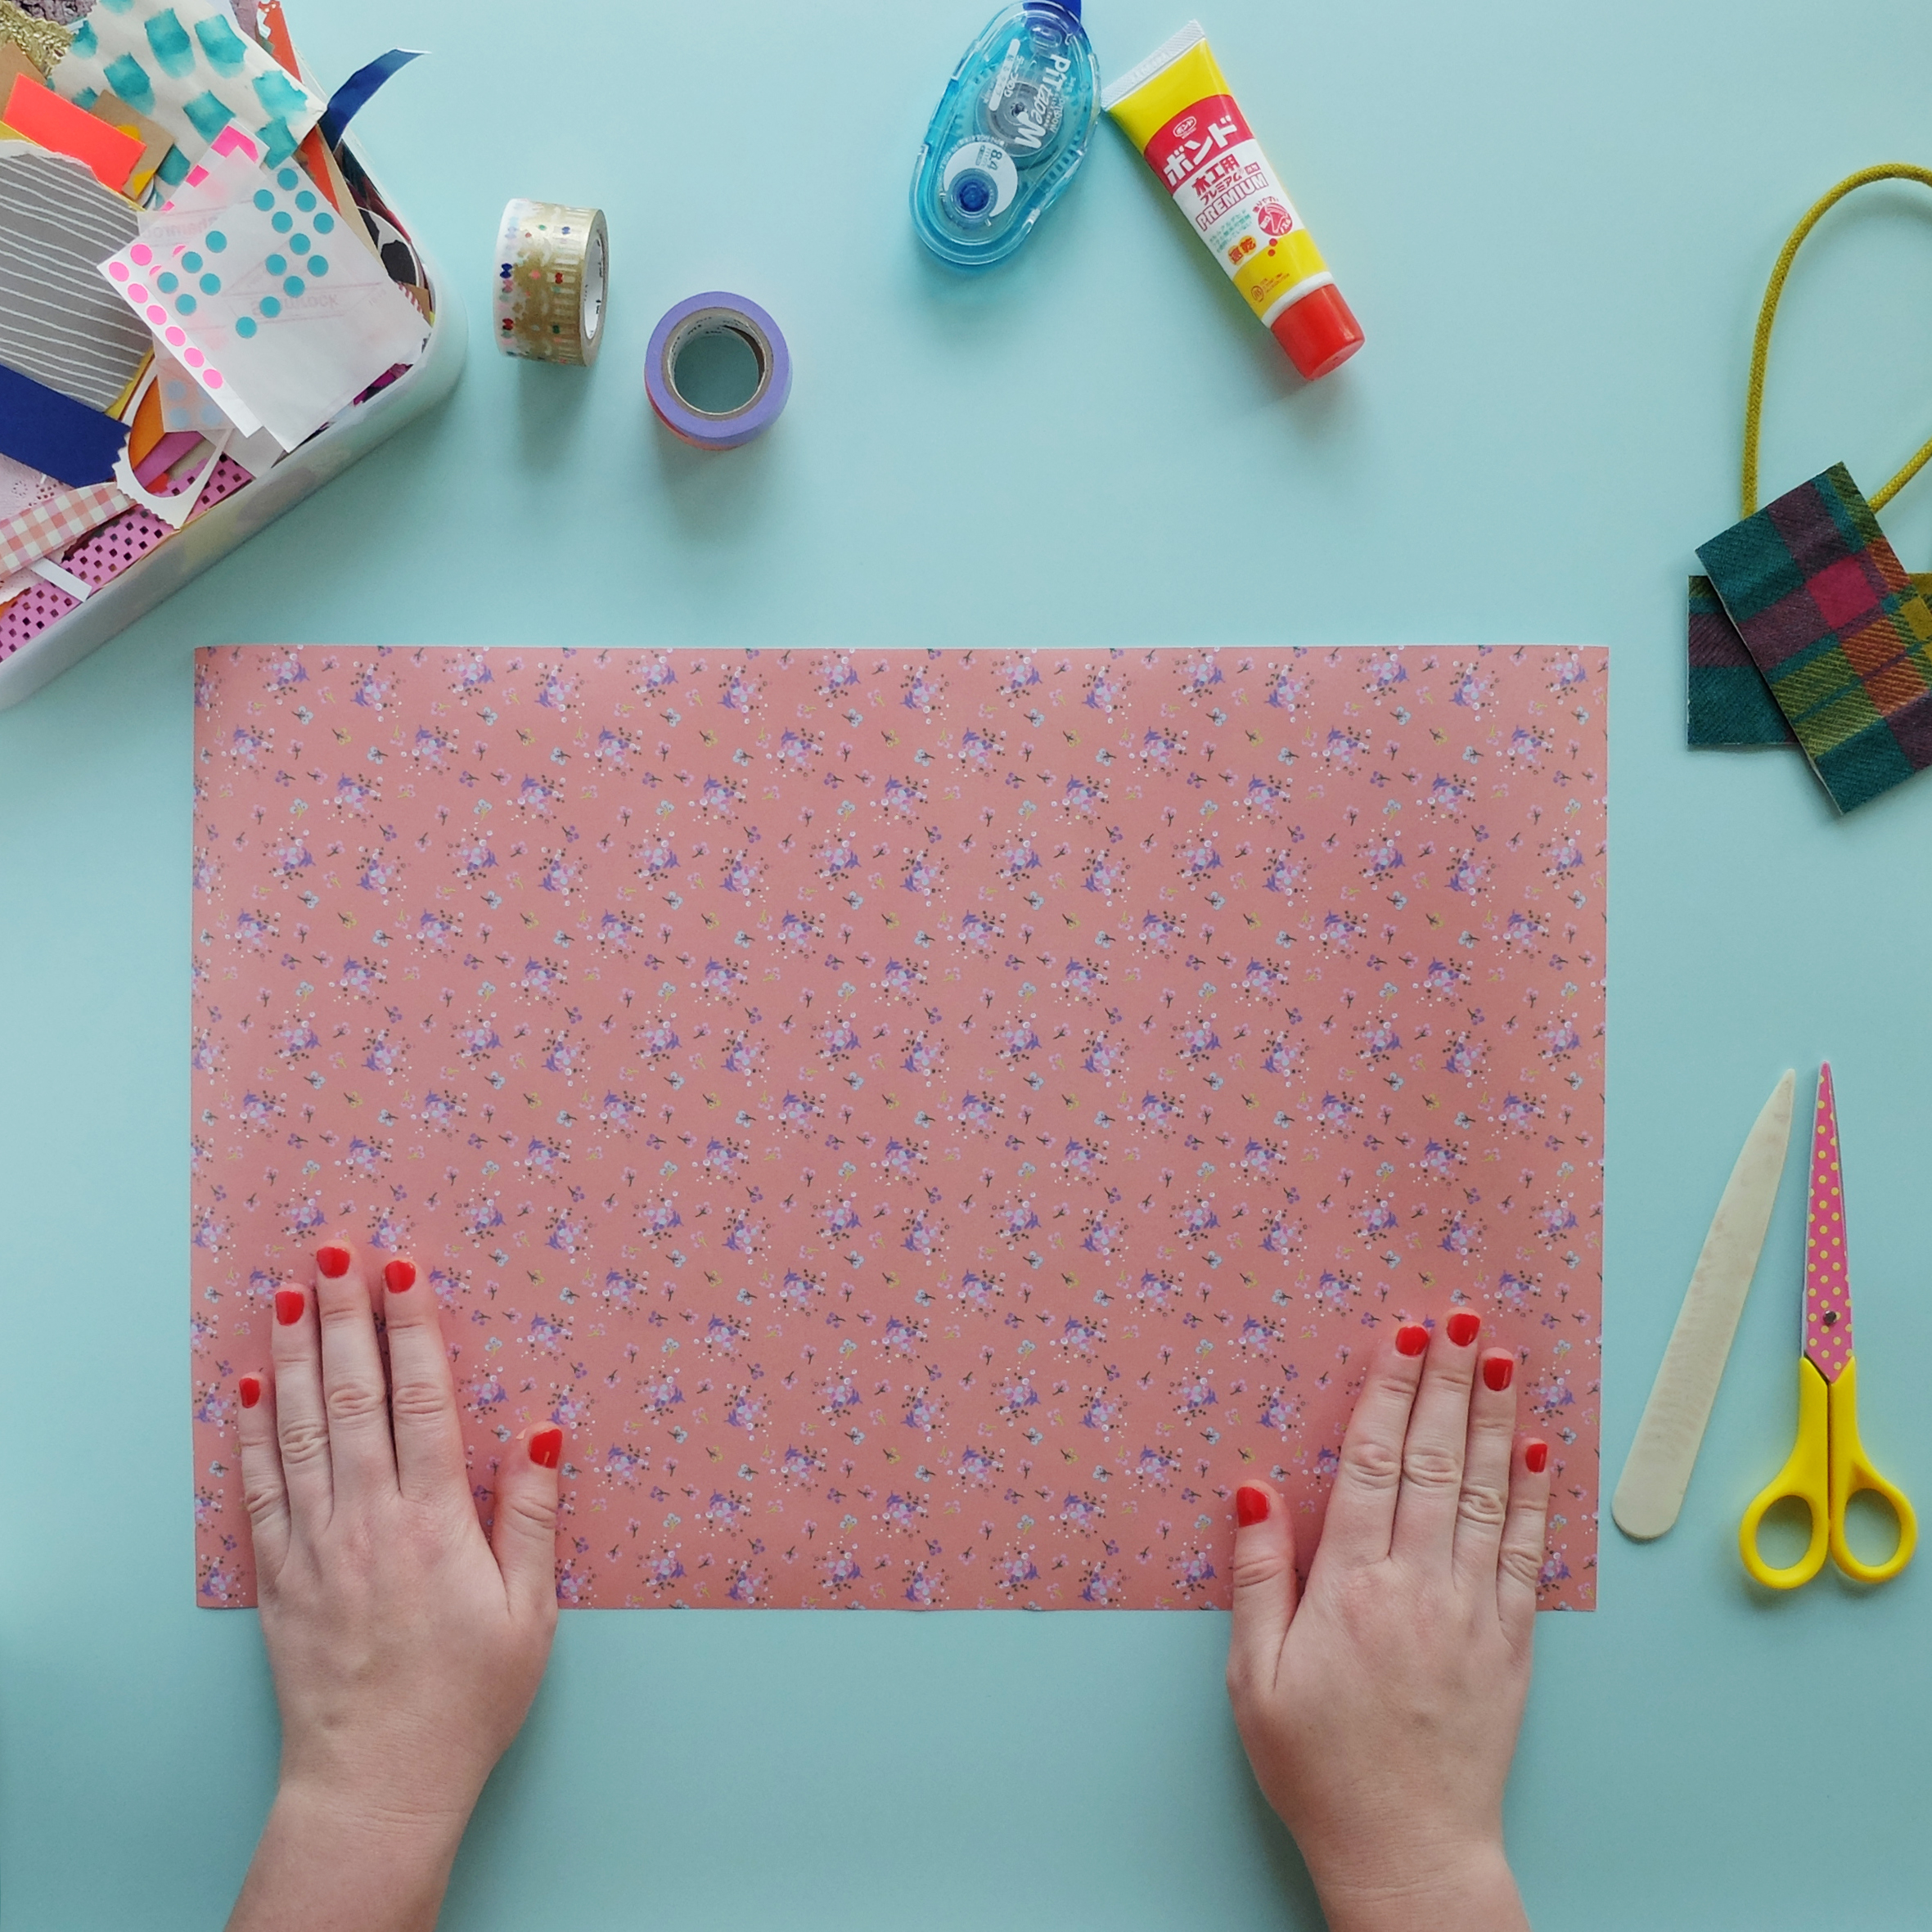
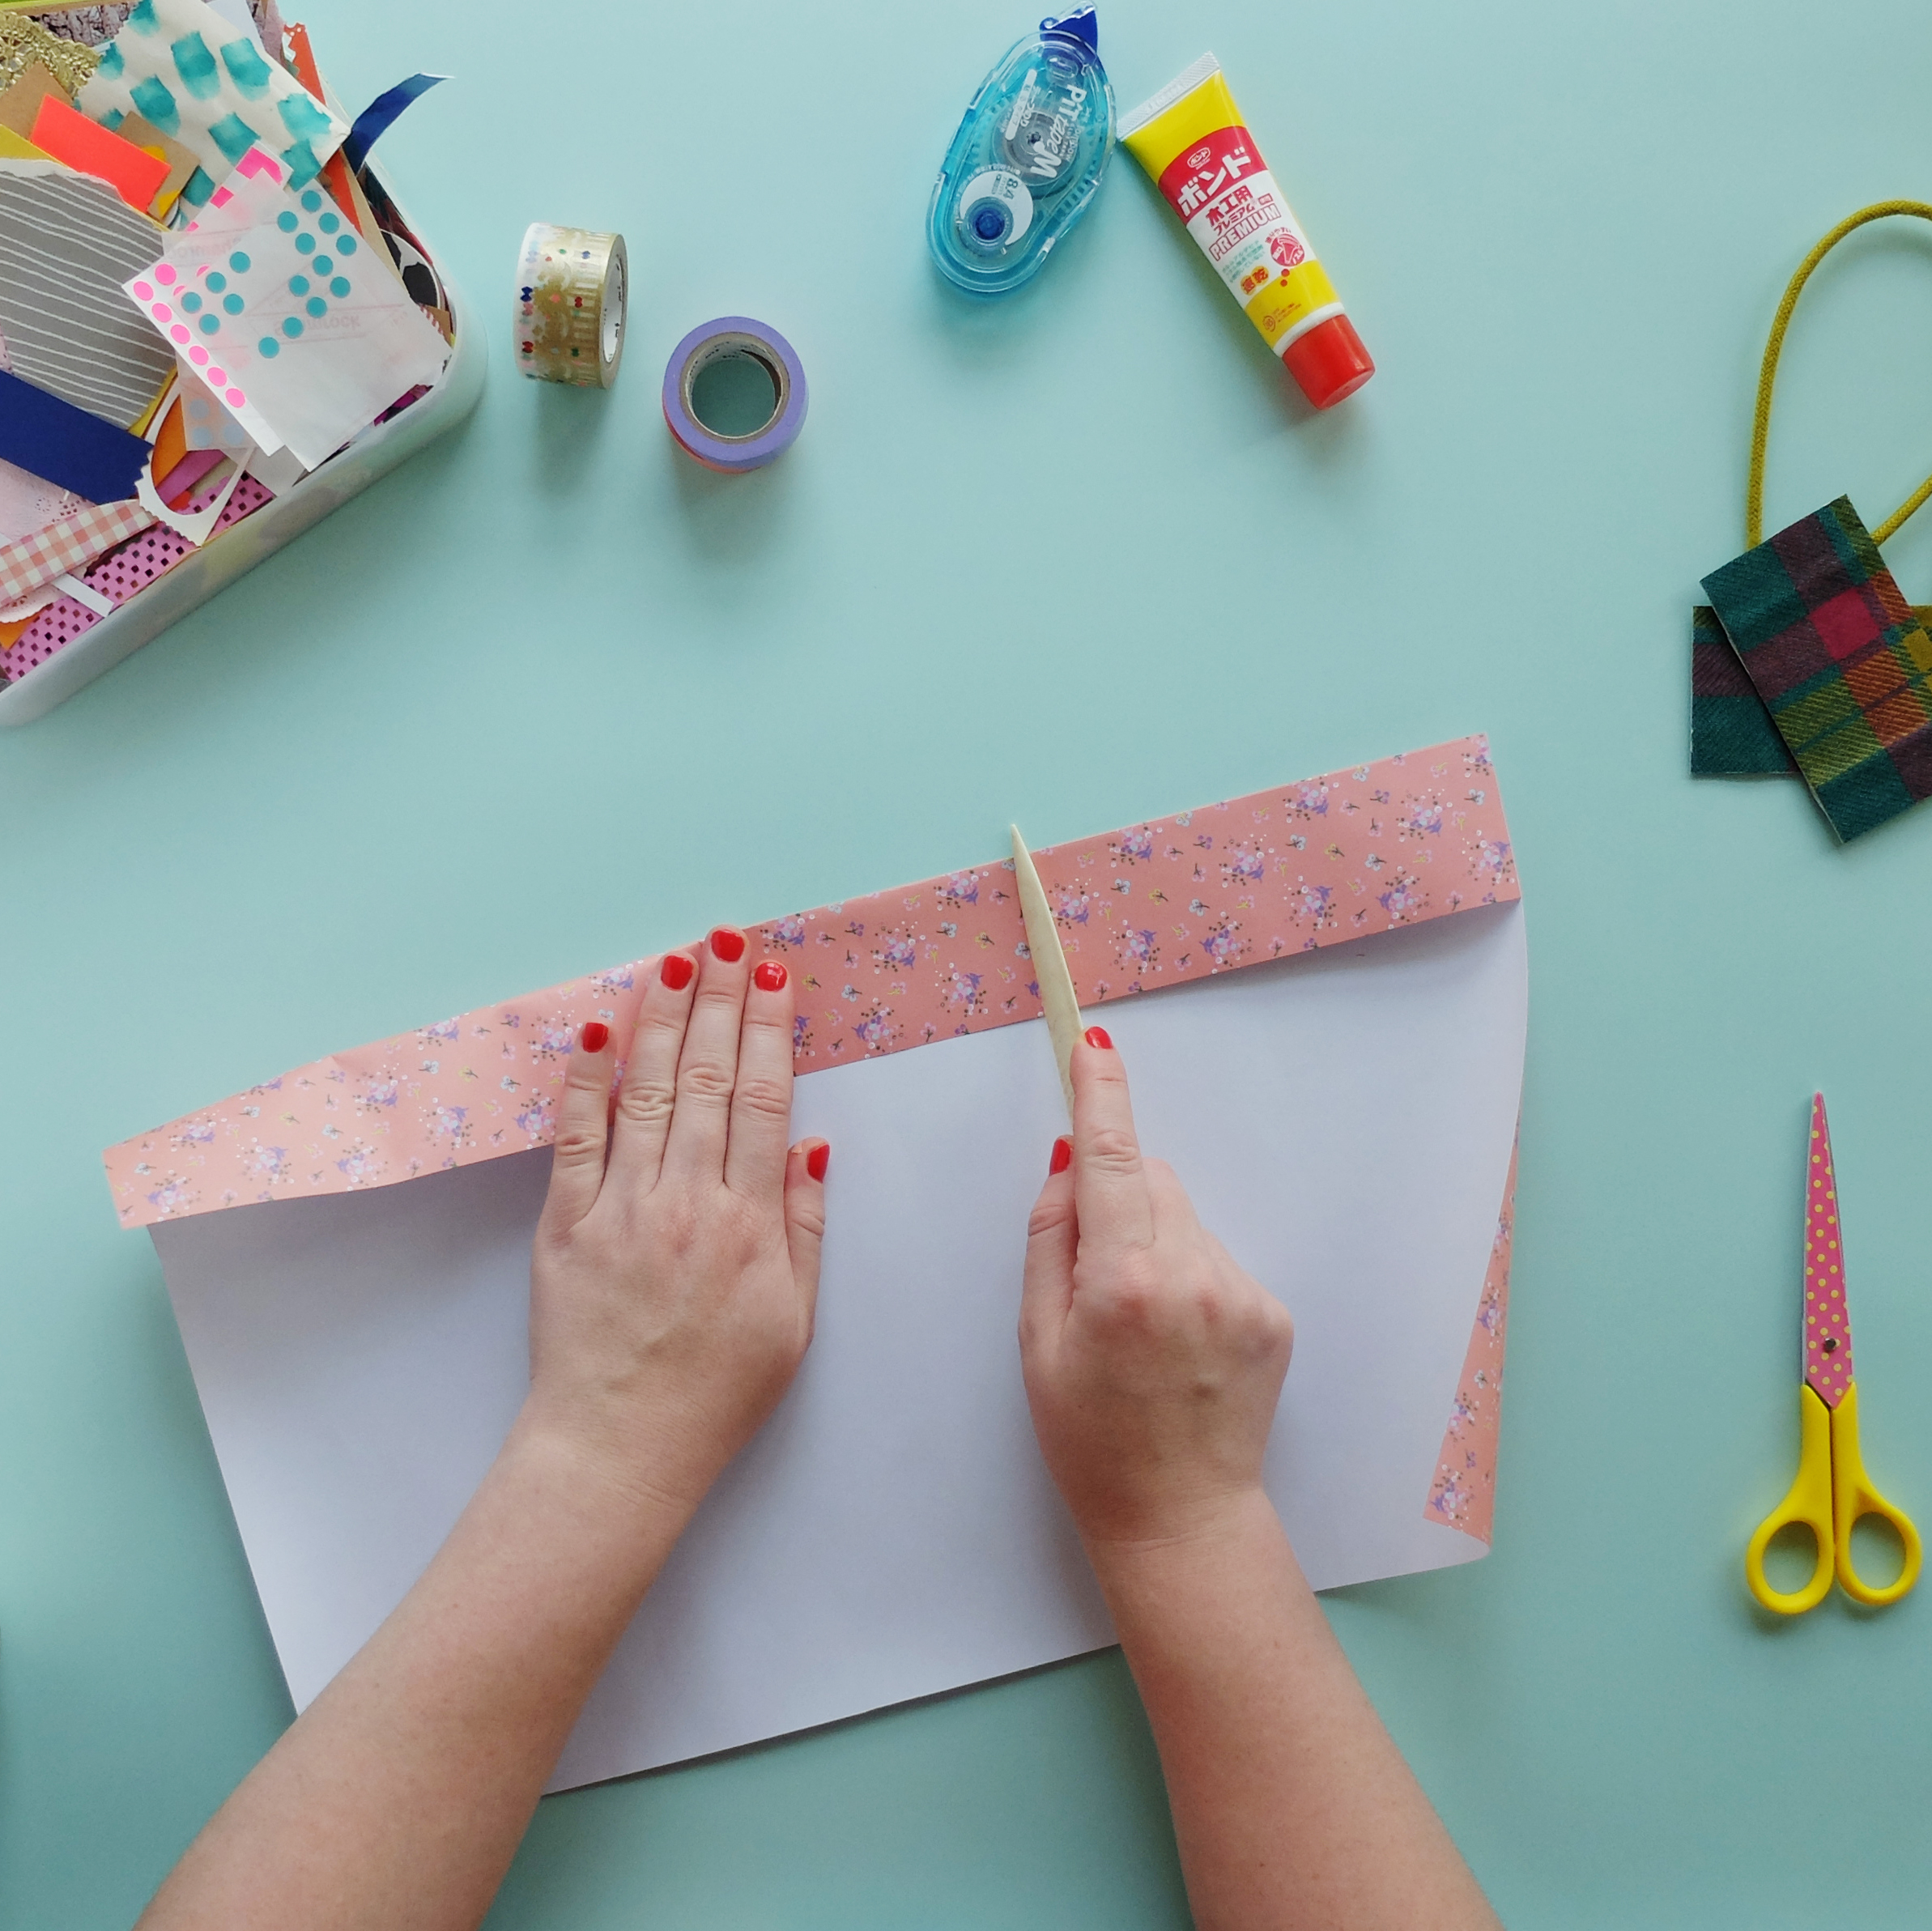
Step 1: You can make your own paper bag from most types of paper: I've used pink floral wrapping paper. Cut a rectangle twice as wide as you want the finished bag to be, and about 10 cm (4 inches) taller. Turn the paper over so the patterned side is facing down. Fold 5 cm (2 inches) over at the top edge and smooth the crease with a bone folder or the handle of a pair of scissors. Use the tape glue and mt tape to secure this fold in place.
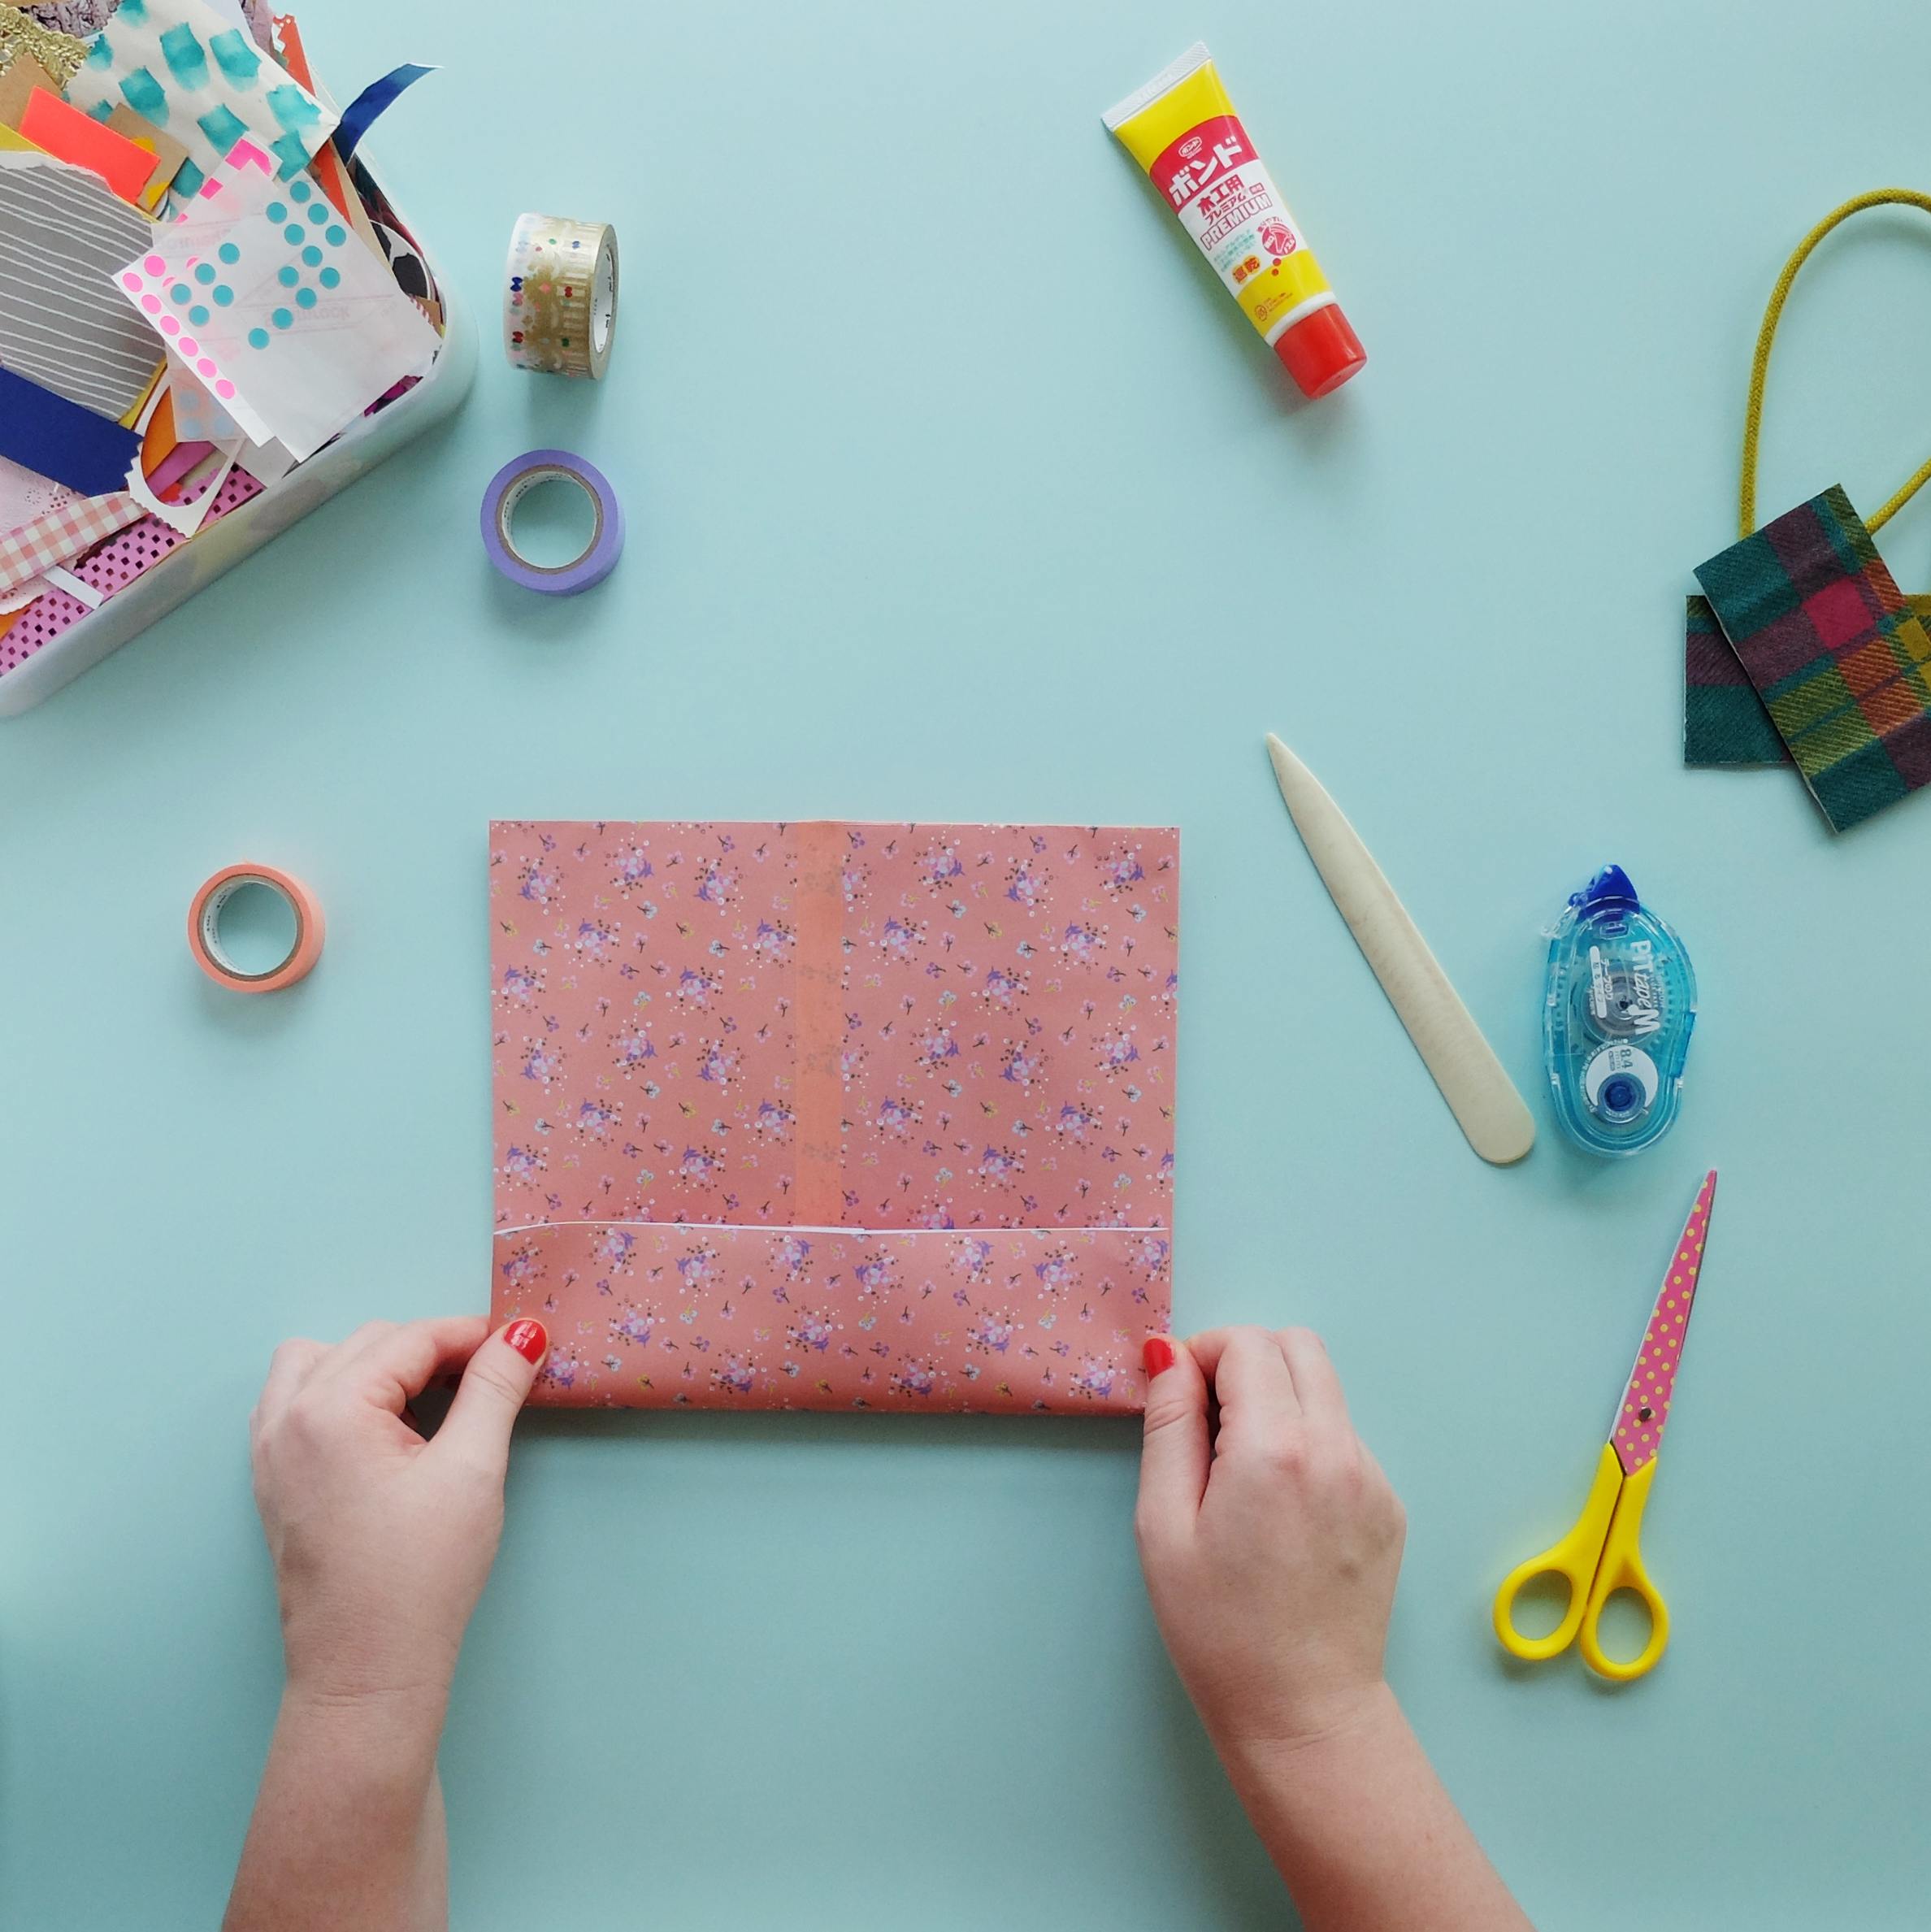
Step 2: Fold both sides edges to the centre so that they meet with a small overlap of approximately 1 cm (3/8 inch). Secure these edges together with mt tape, or for a more simple look you could use tape glue. Make a crease for the base of the bag, about the same width as the size you would like the base of the bag to be. Approximately 5-6 cm (2-2.5 inches) is a good size.
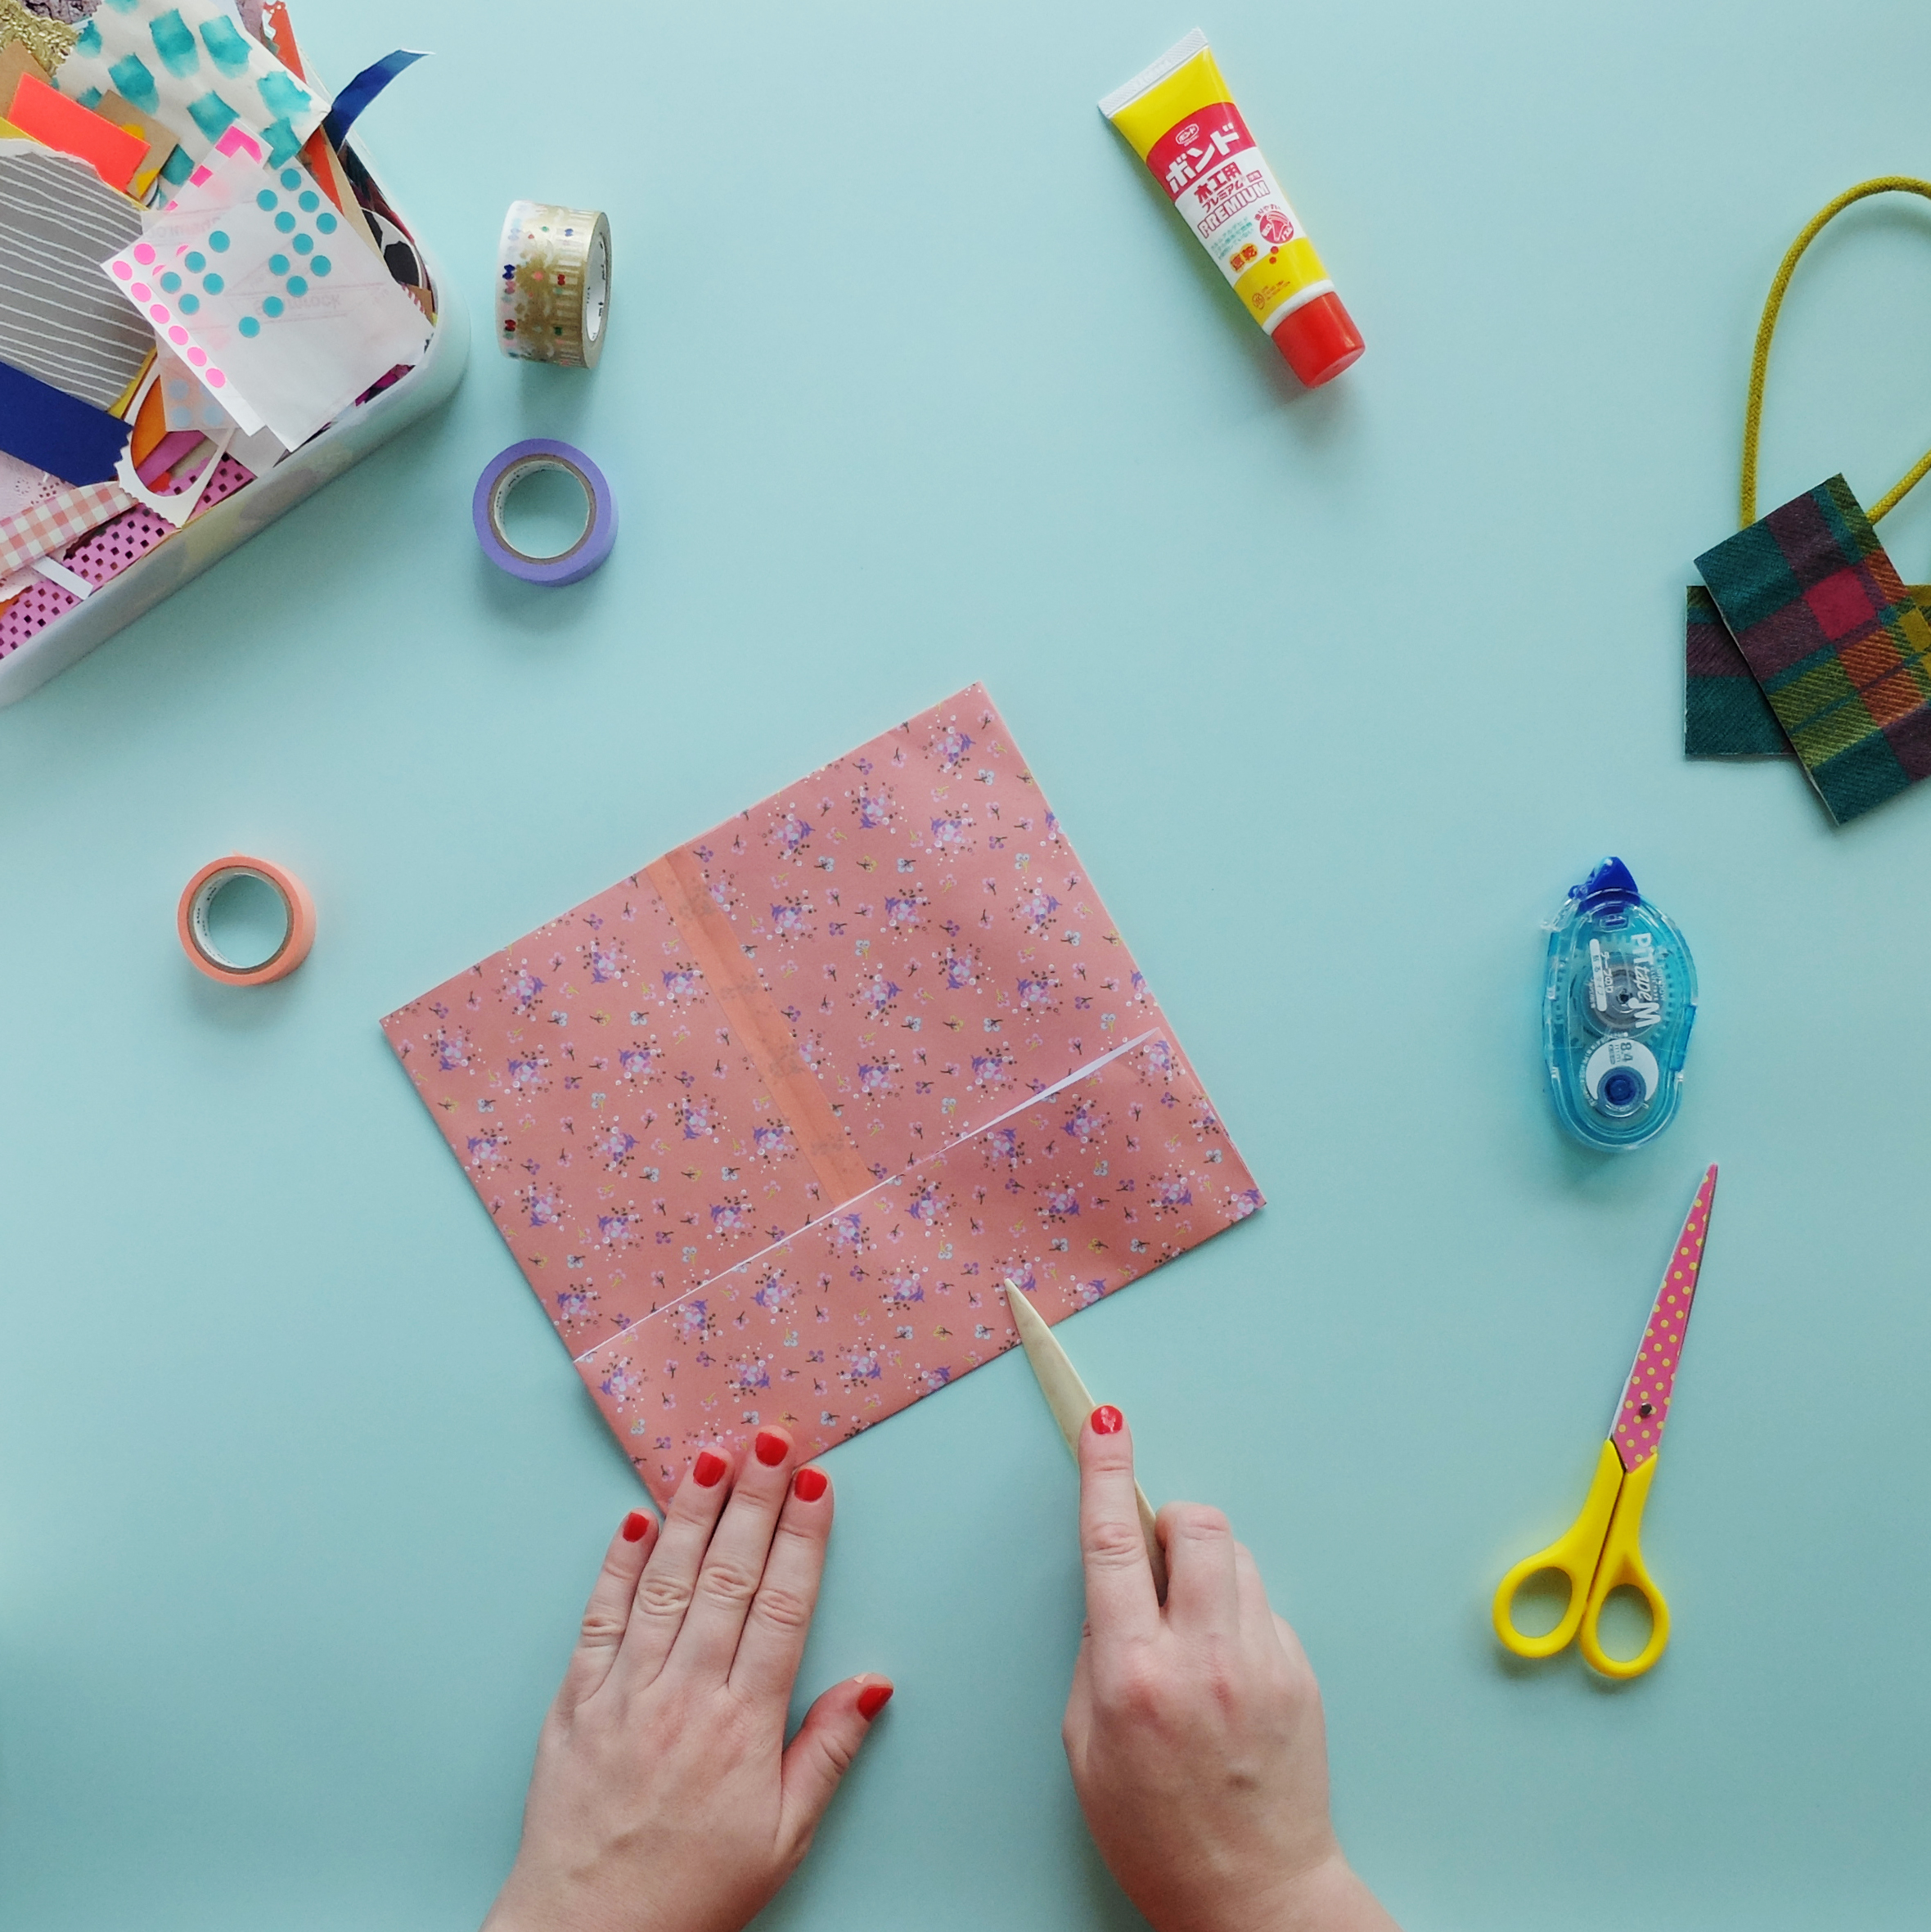
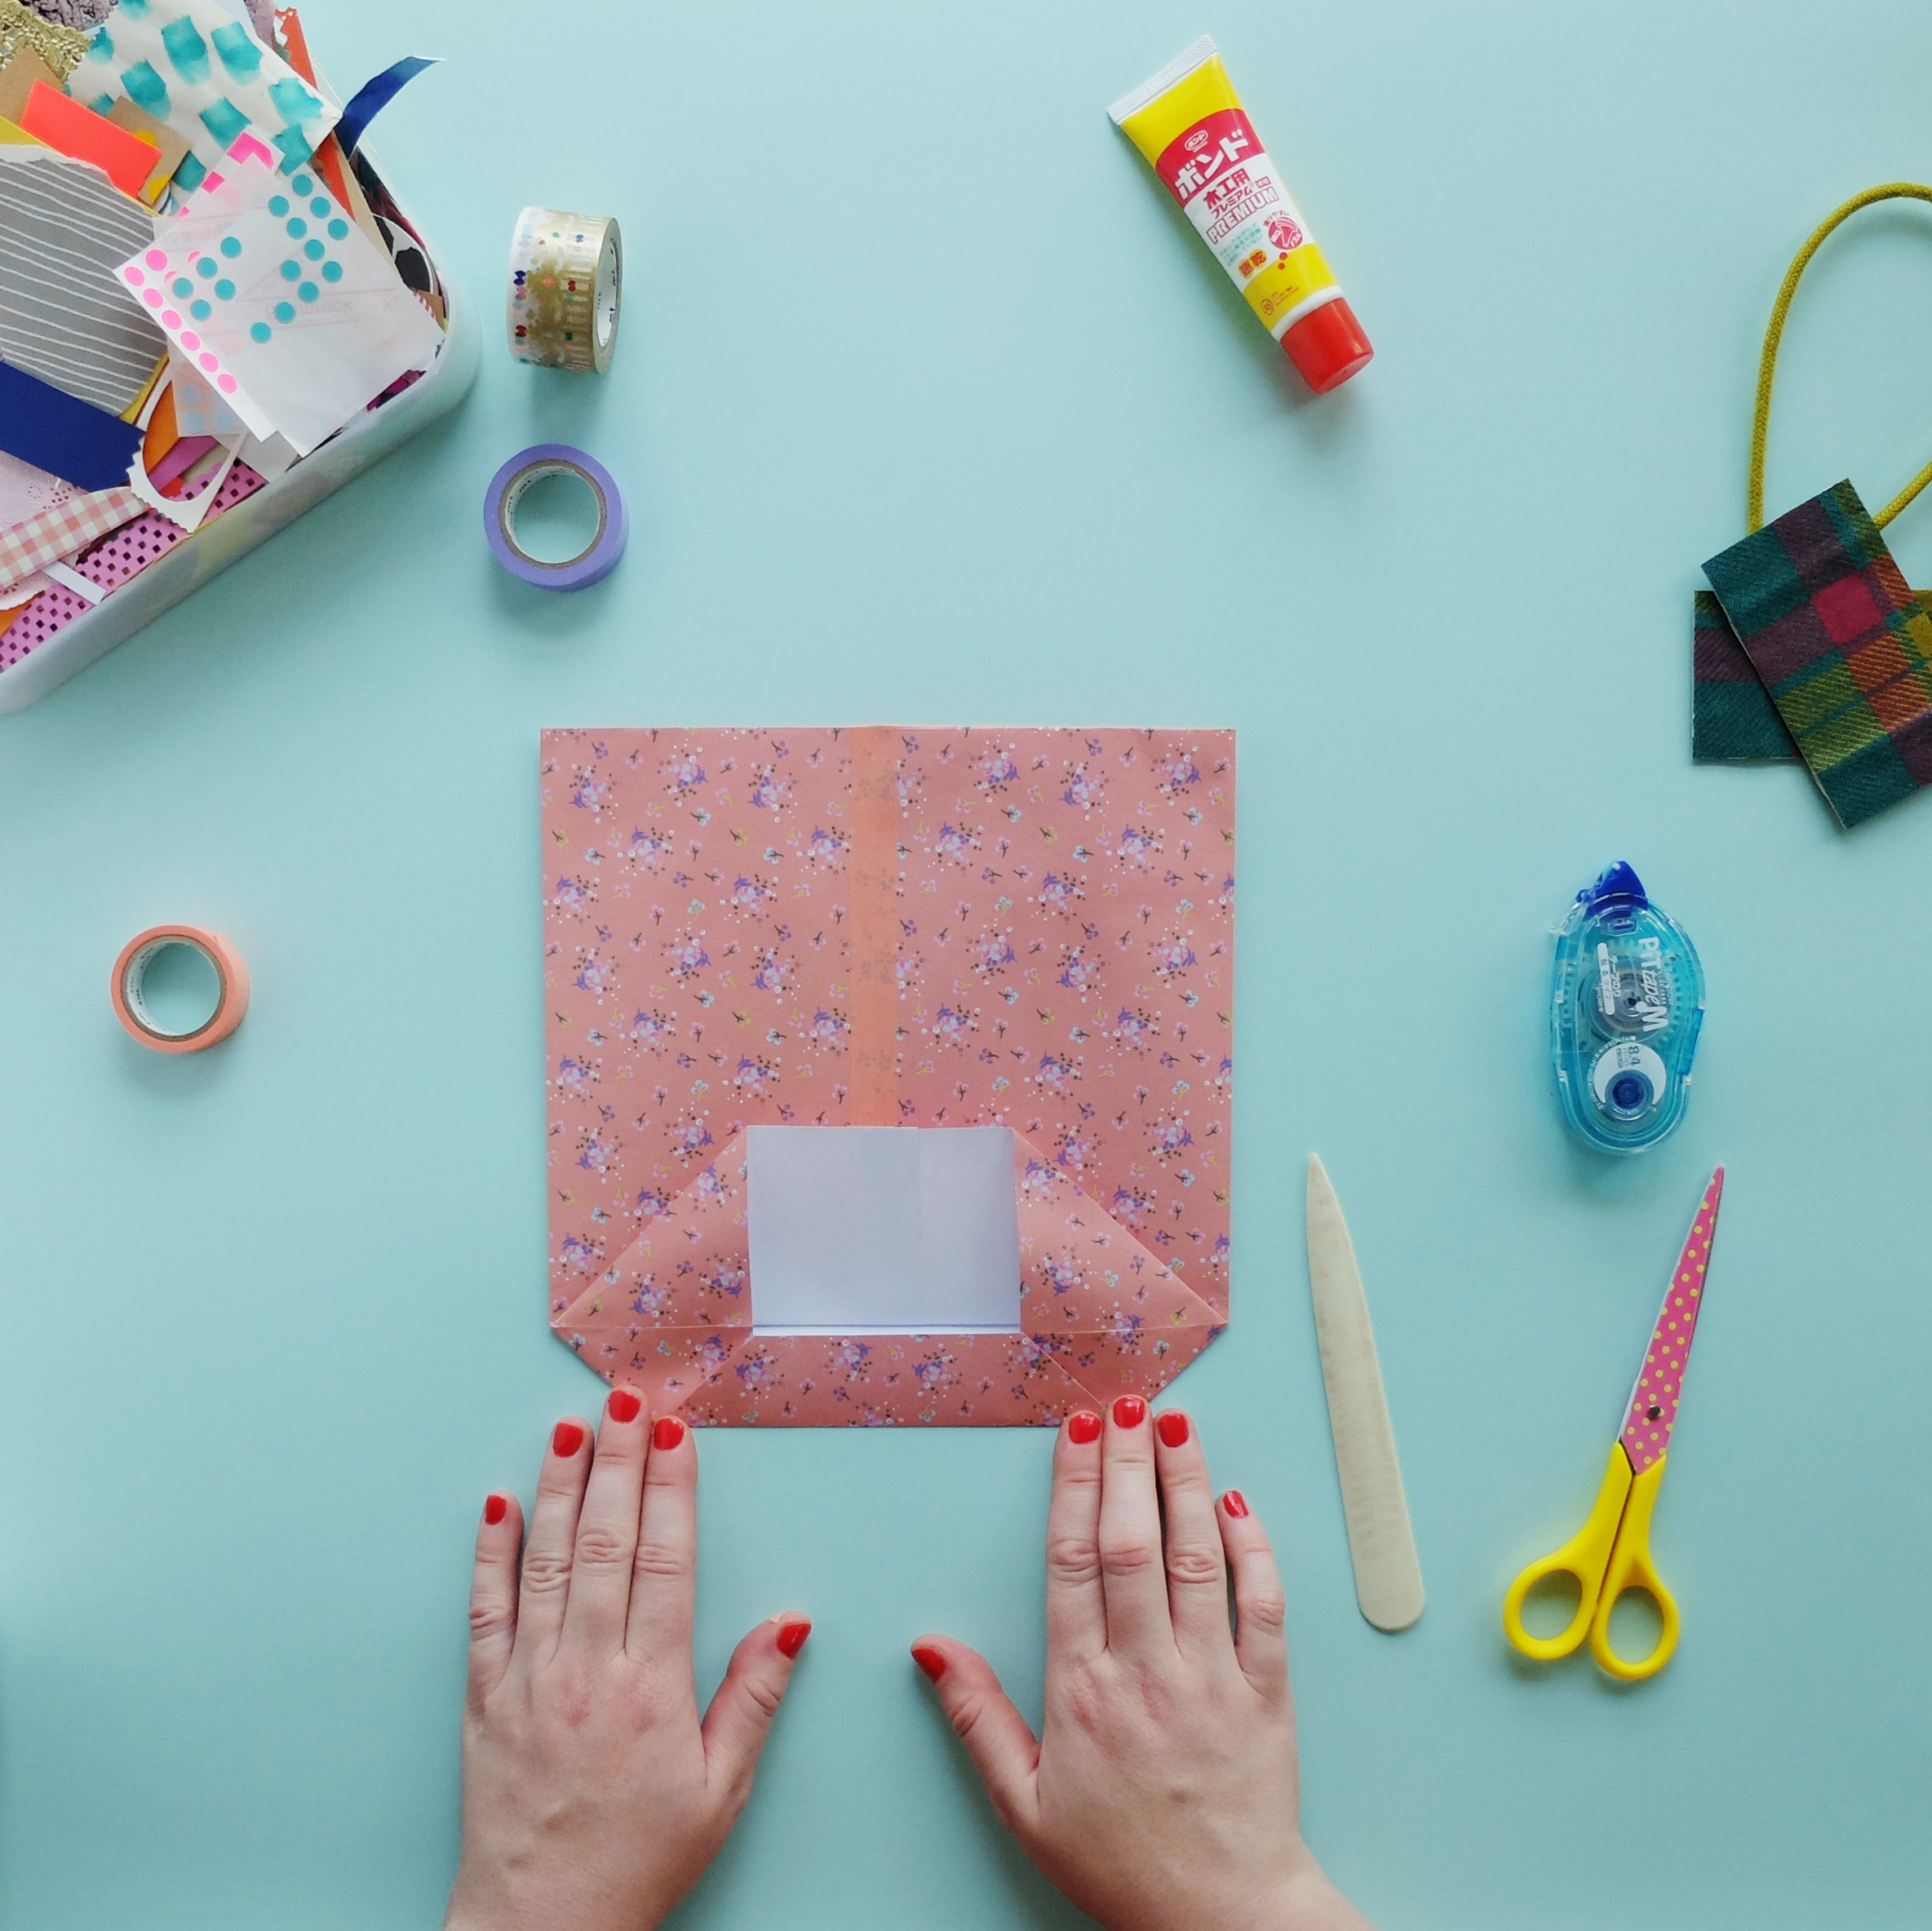
Step 3: Open the top layer of the base towards you and press the corners into a triangle shape as shown in the photo.
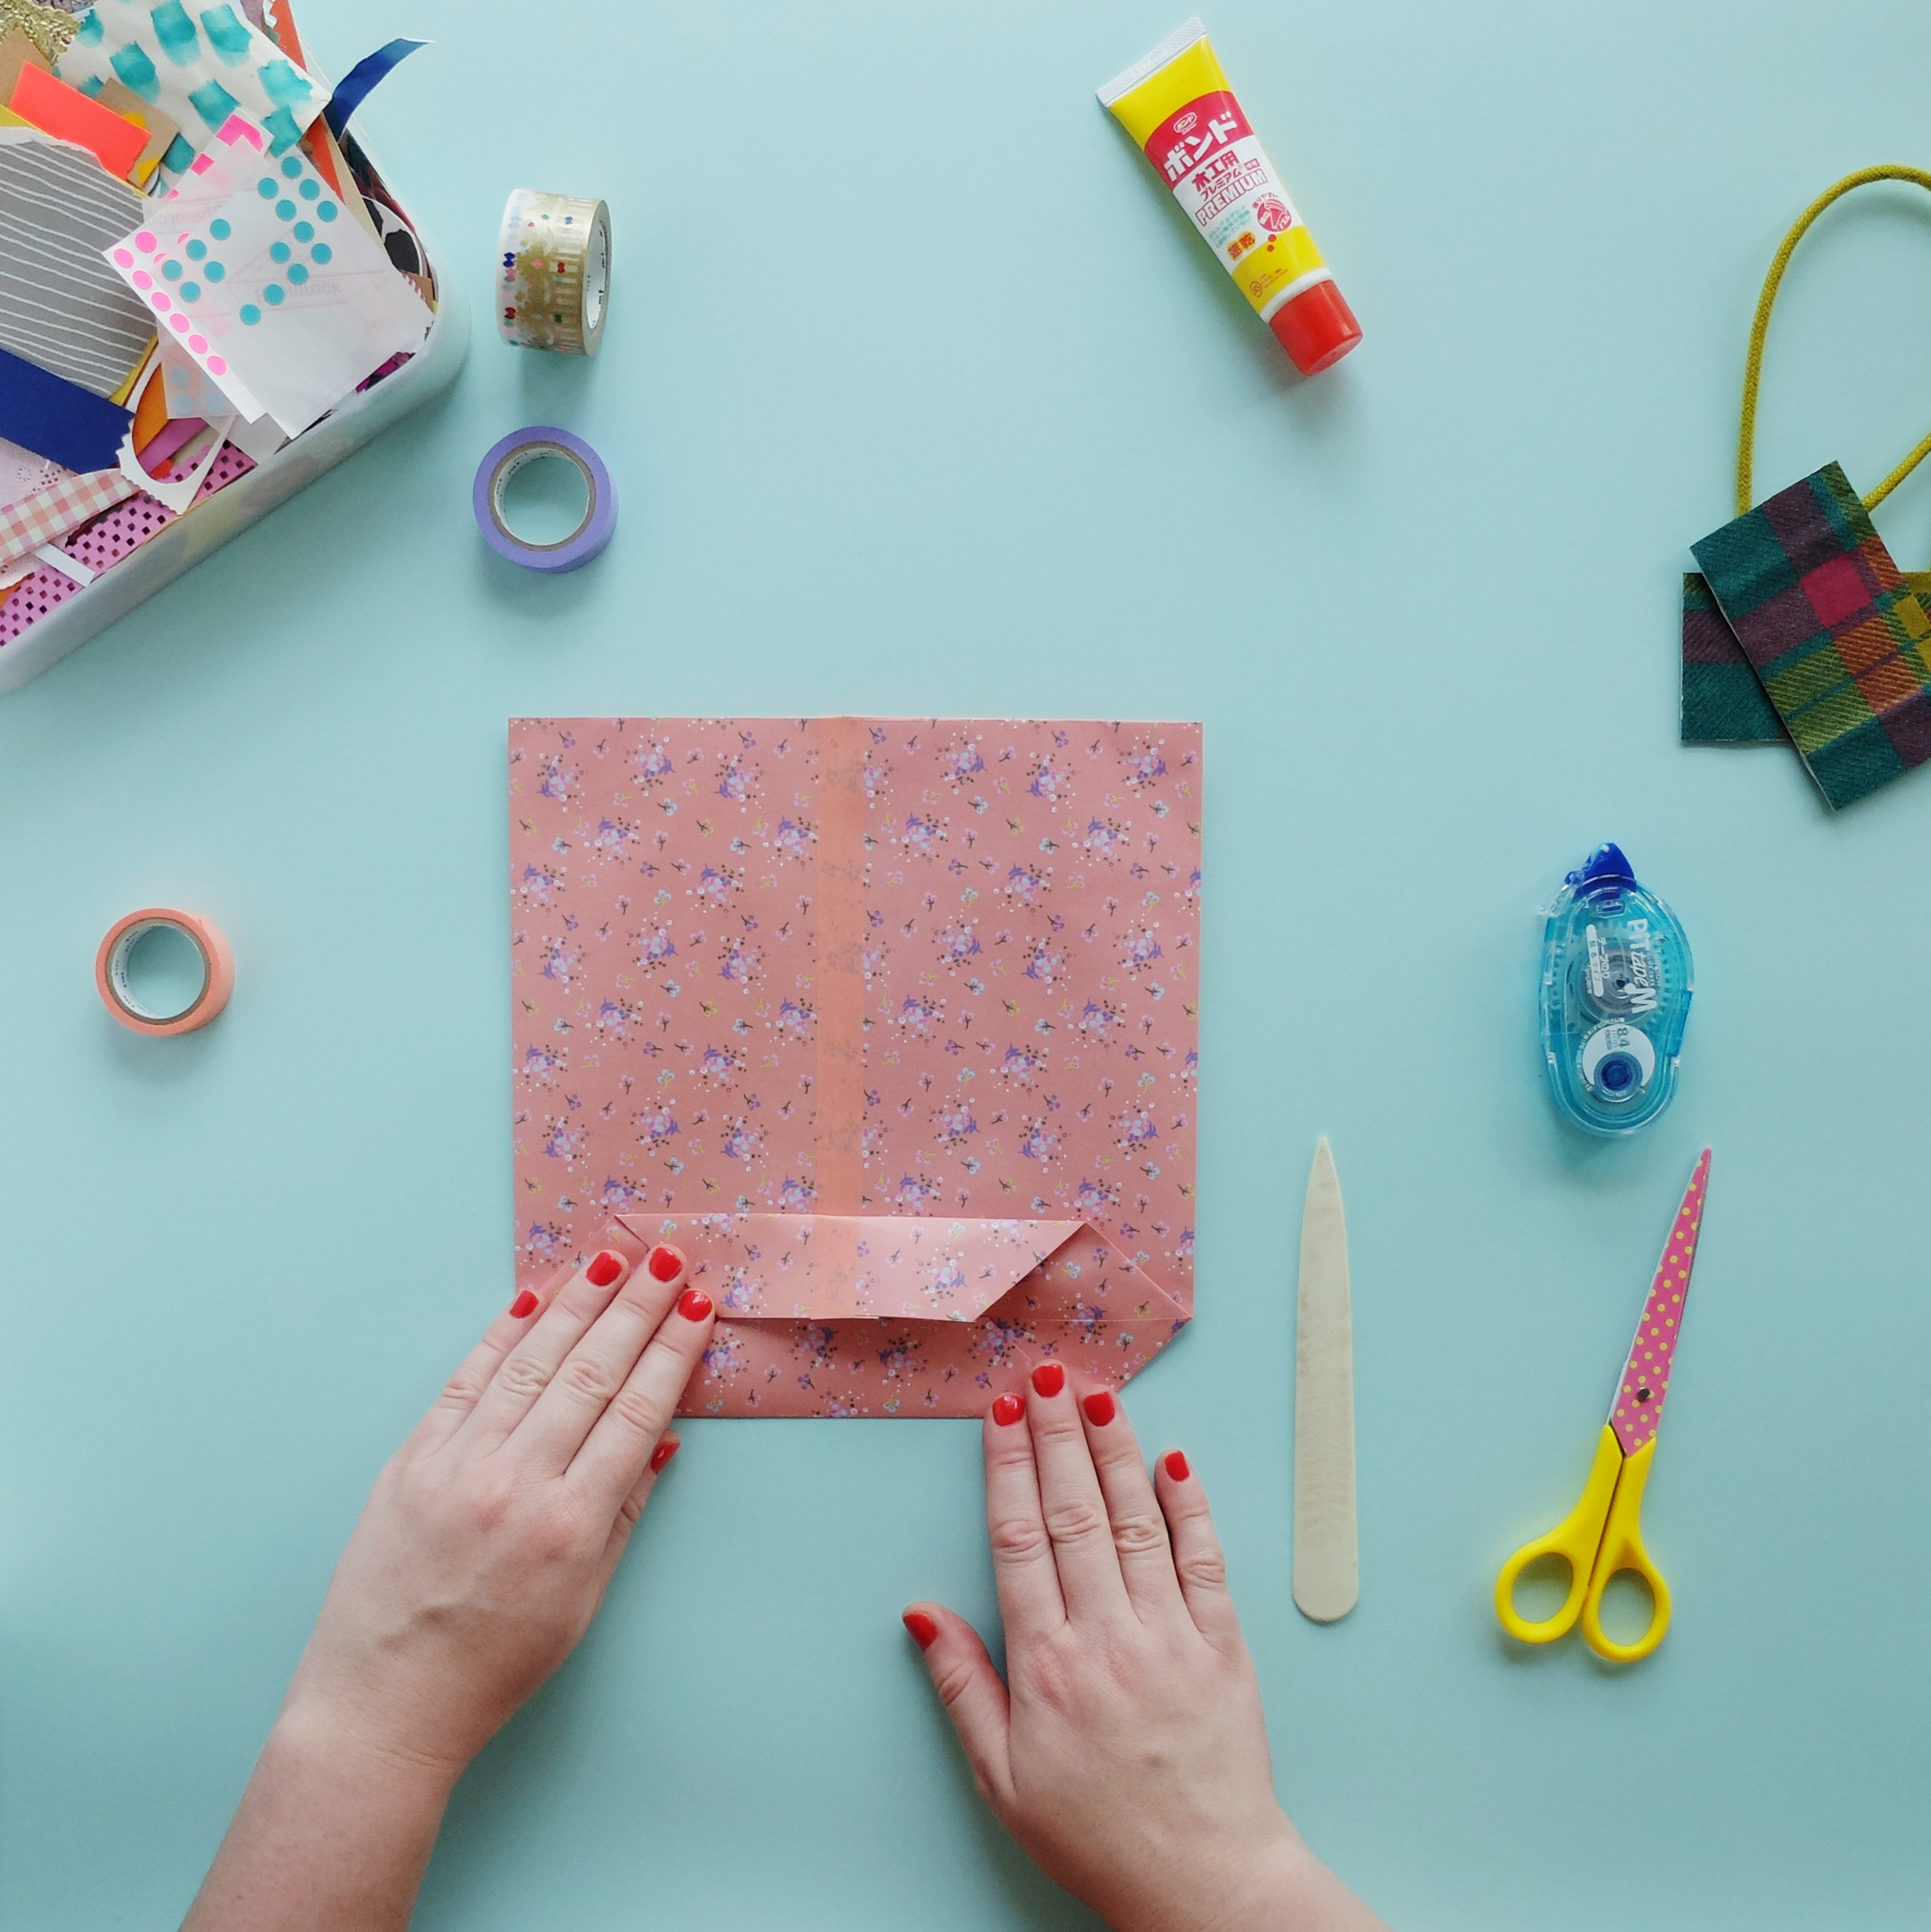
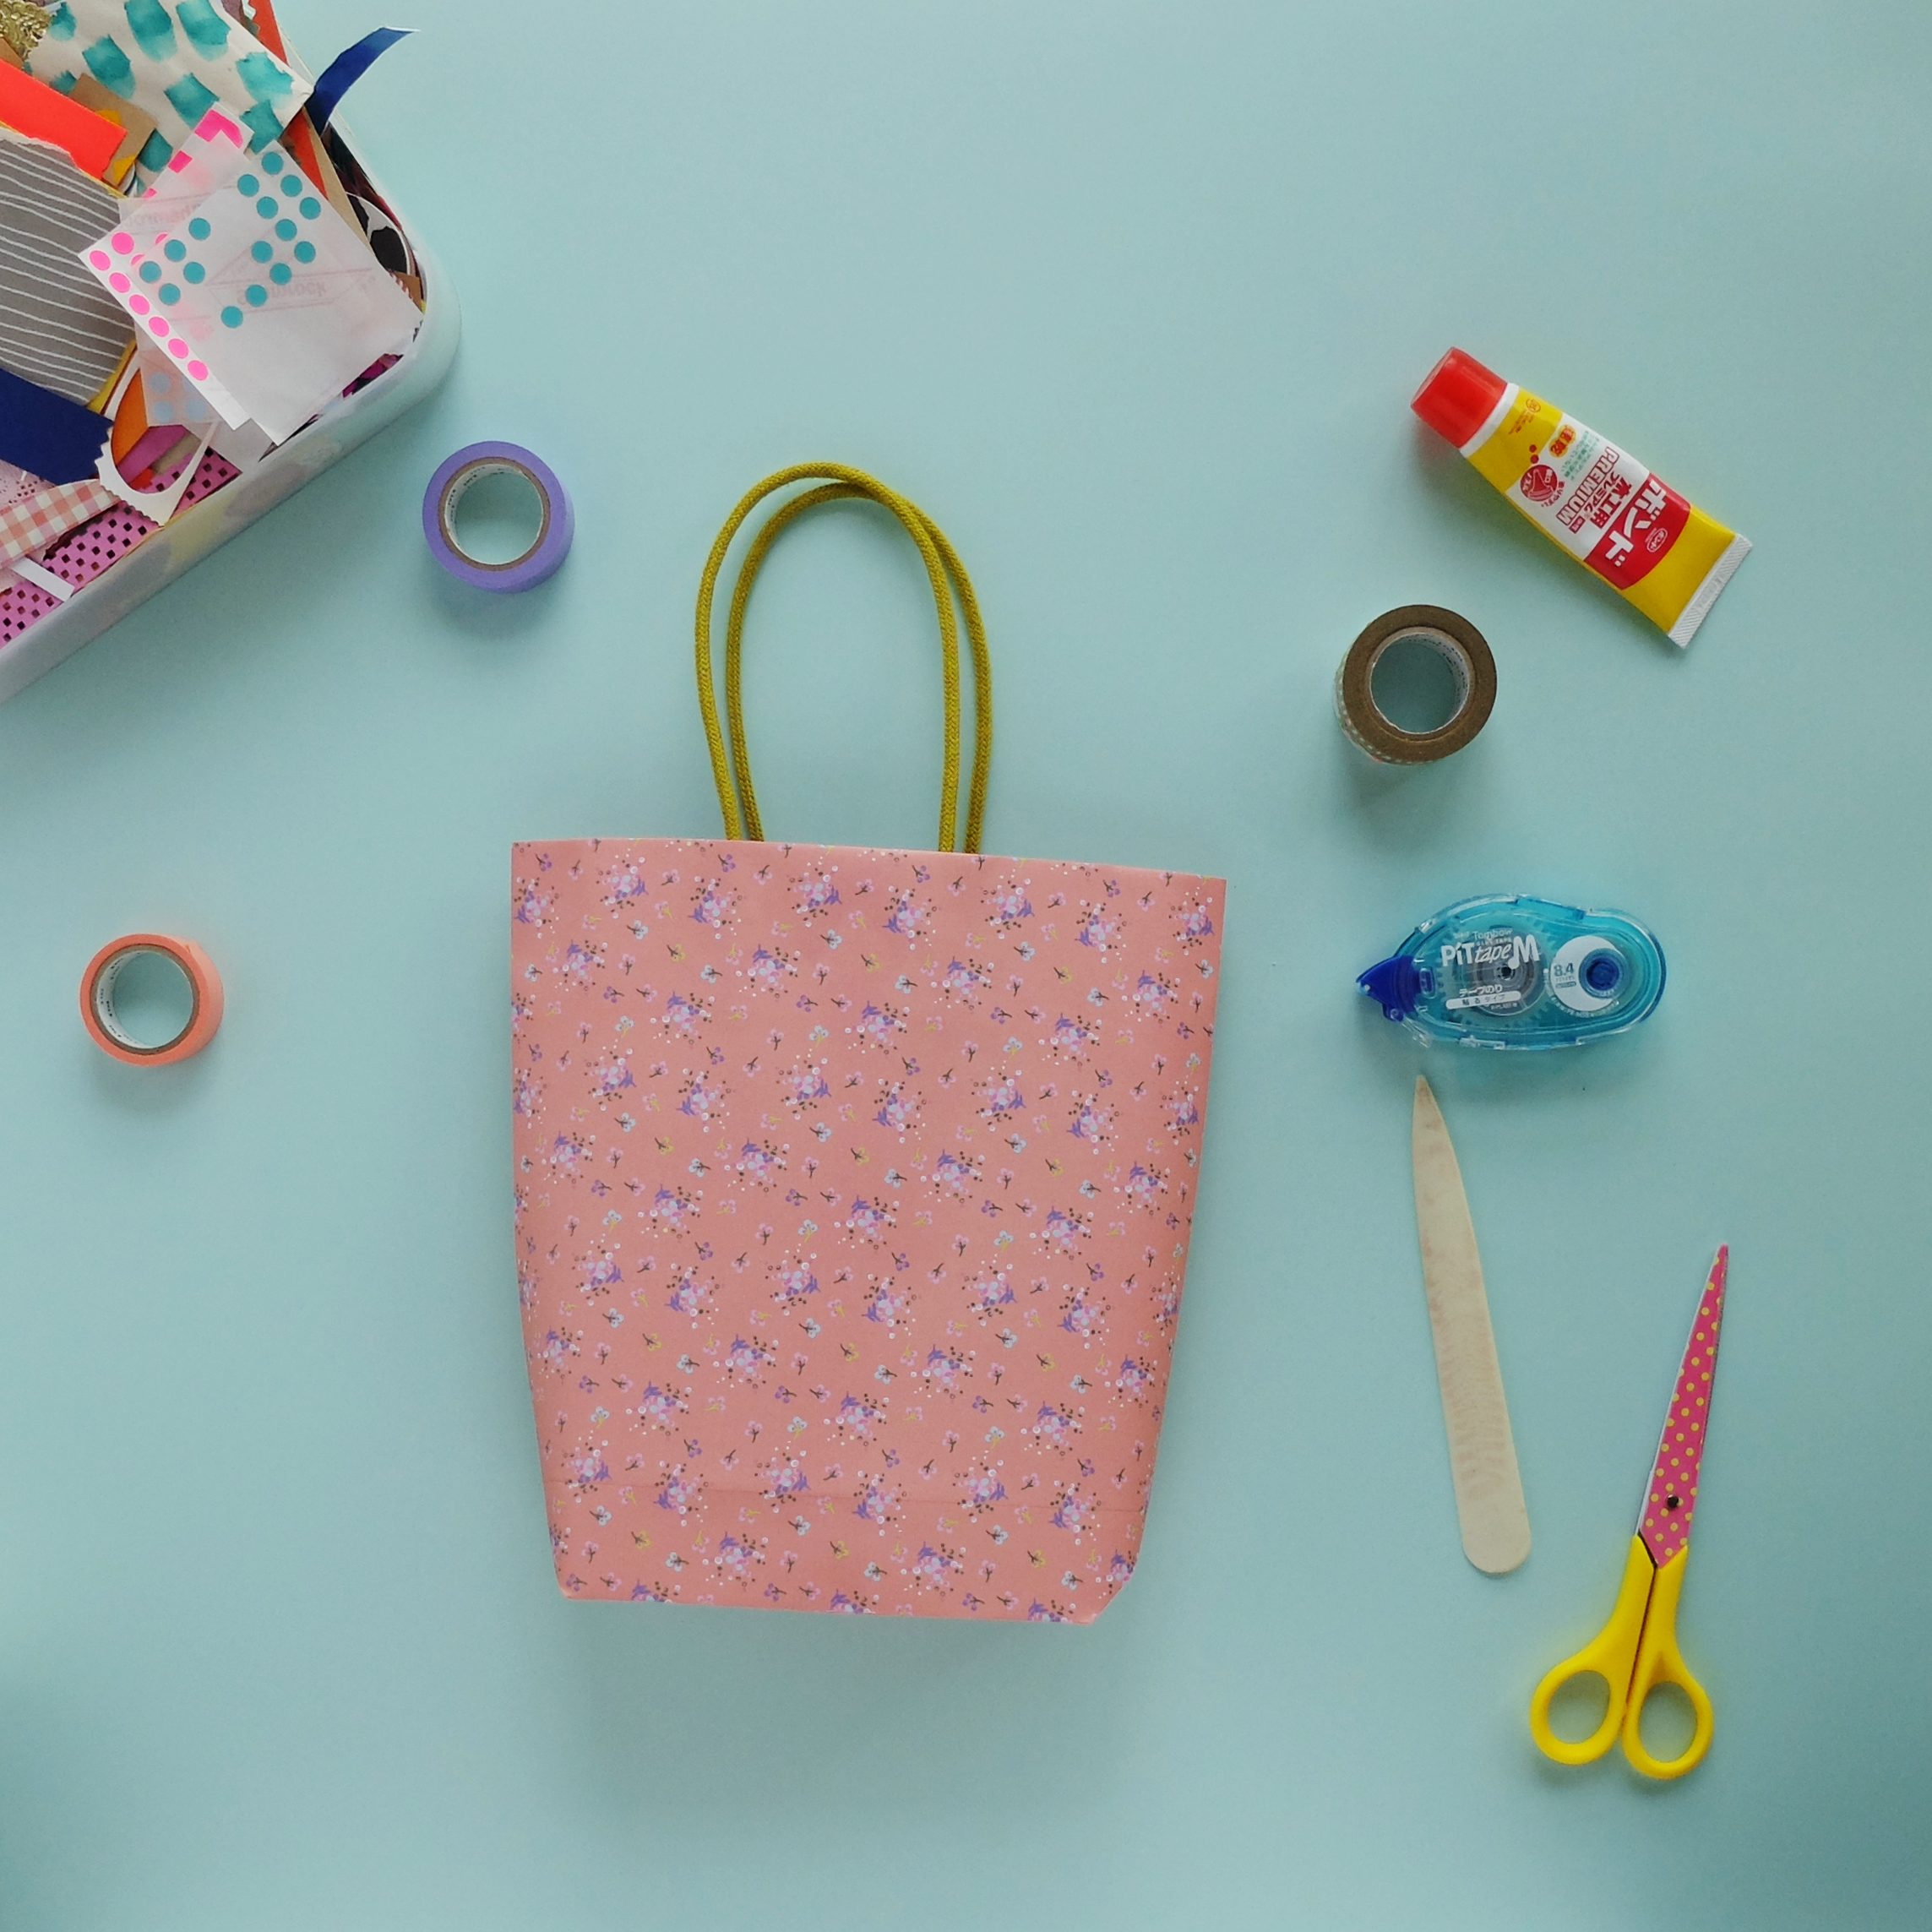
Step 4: Fold up the bottom edge of the base to meet the fold above it. Then, fold the top edge of the base down to the same fold and tape the edges together with wide mt tape. Now, cut some handles from an existing shopping bag and attach them to the inside top of the bag with craft bond glue. Press firmly to hold in place. If needed, secure the handles in place with some mt tape for extra support. You could also experiment with string, pipe-cleaners or ribbons as alternate handles. Decorate the bag with a collage of paper and fabric, if you like.

E N J O Y !
LOVE LOVE
HELLO SANDWICH
XO
BACK TO TUTORIALS


